Sync and Export
The Altis Dashboard allows you to perform data migrations between environments, as well as perform data exports for use in local development environments.
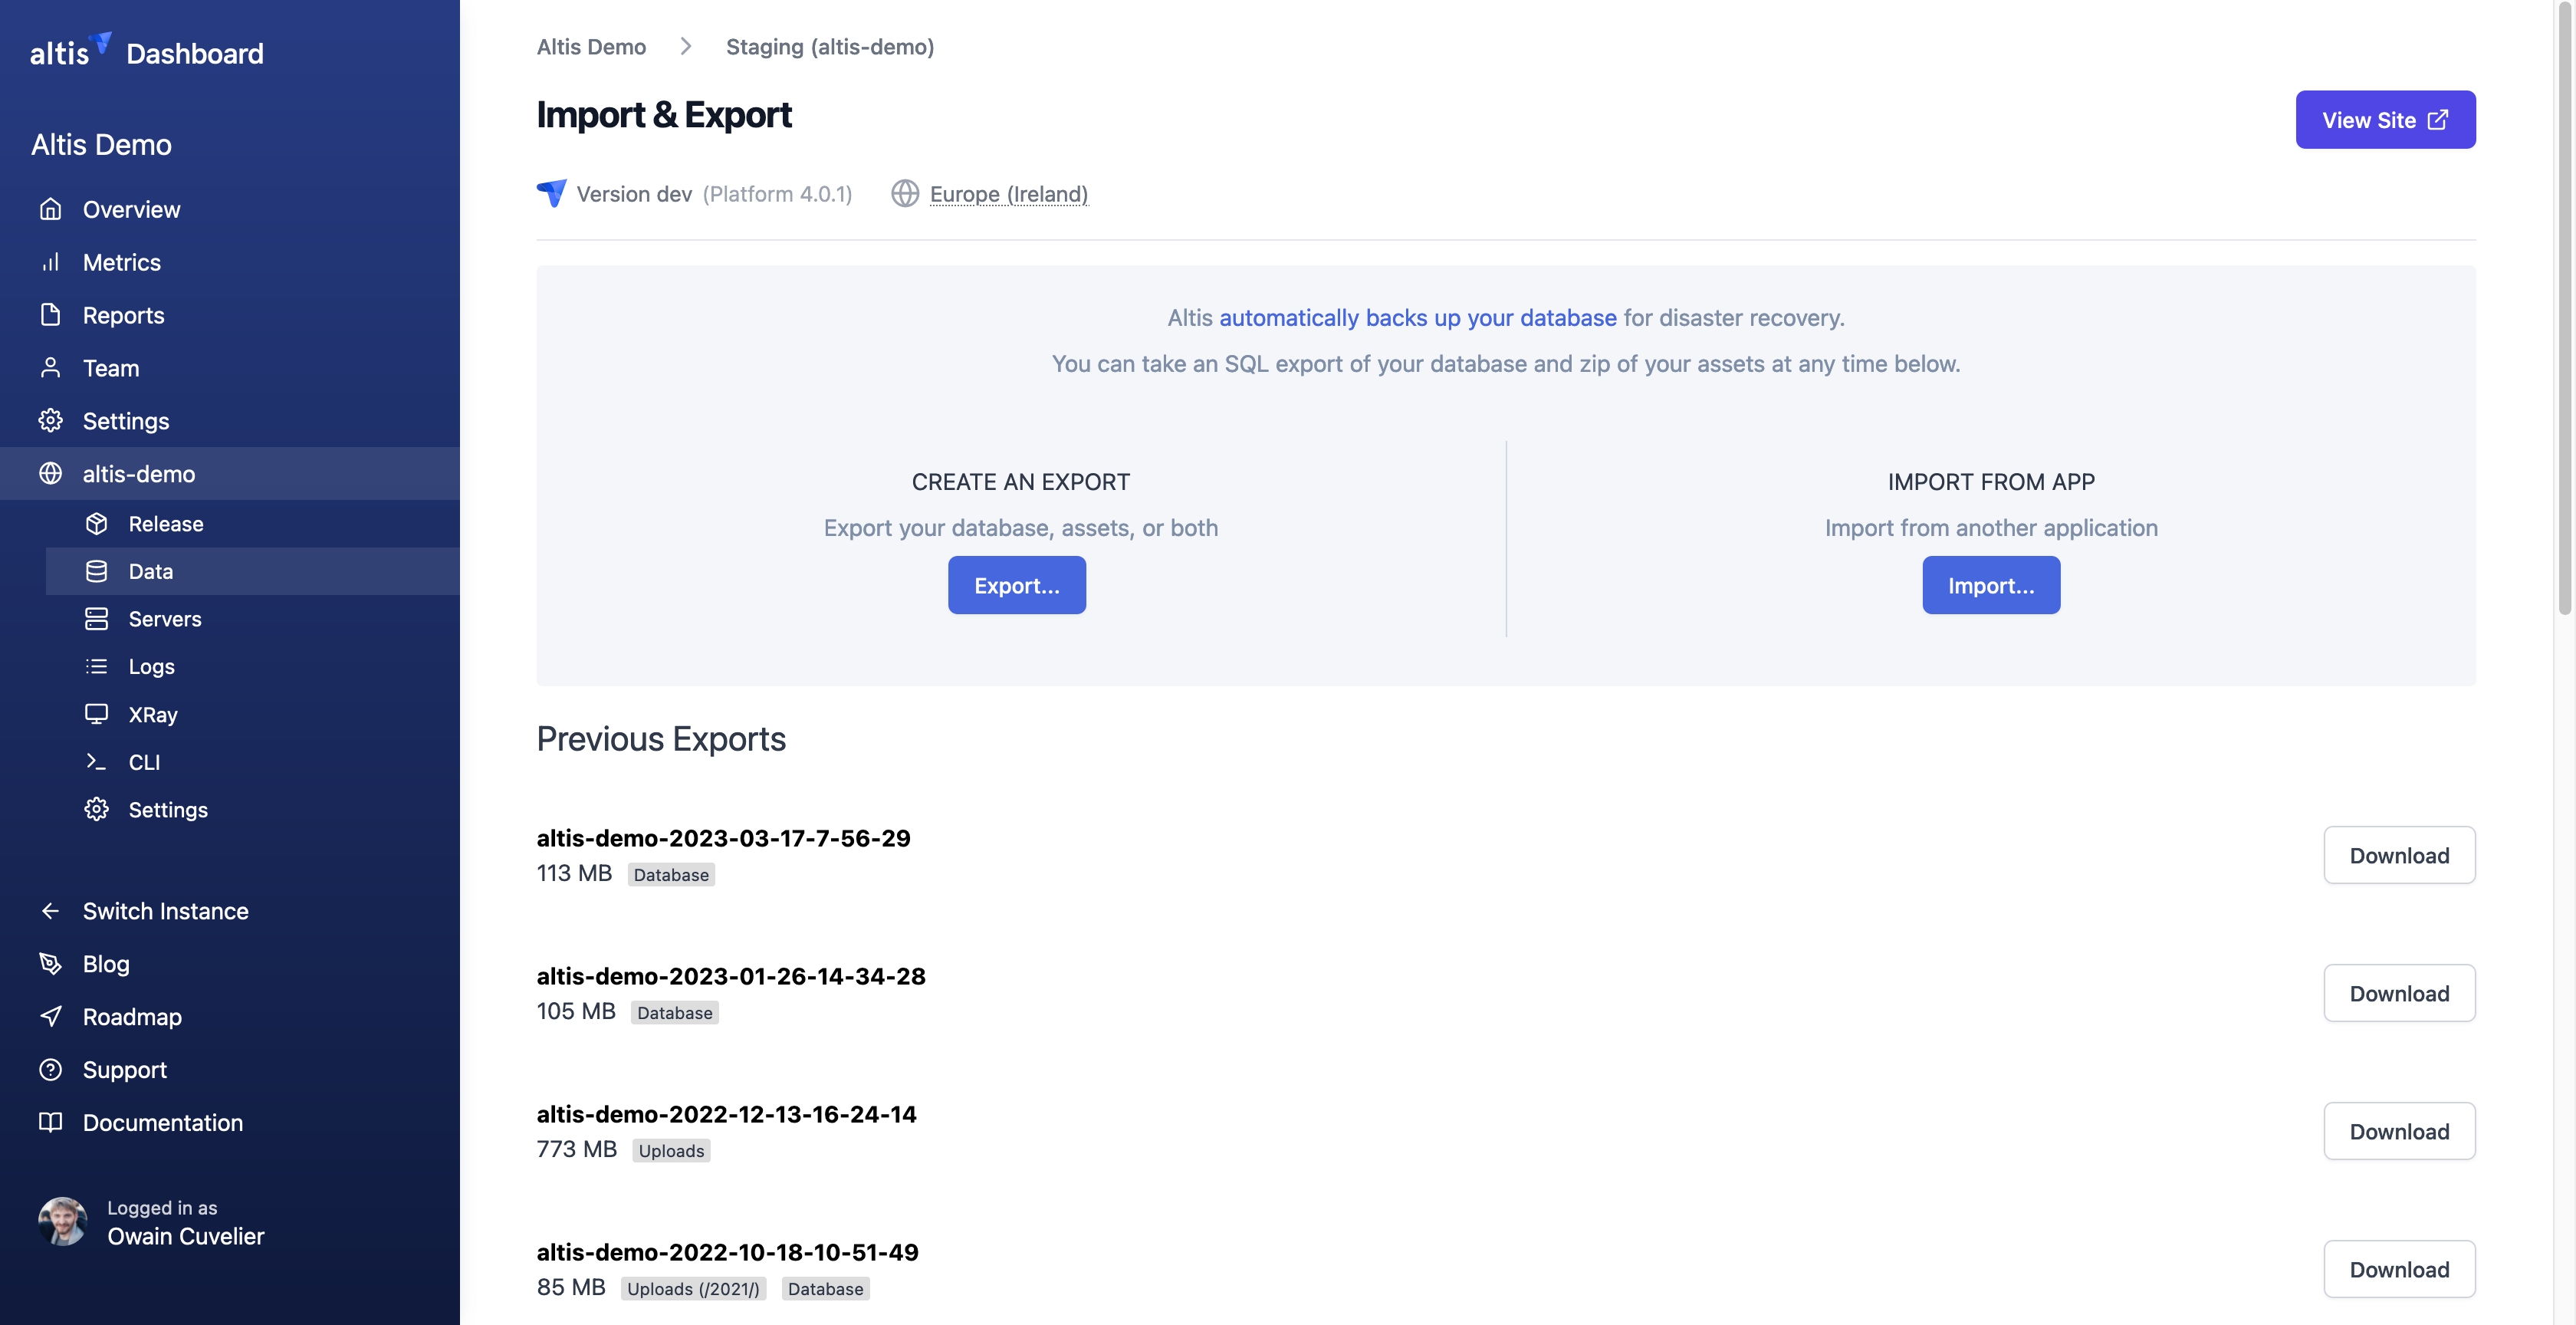
You can find these features under the Sync and Export tab of the selected Altis Environment.
Sync
Environment syncing copies data from one environment to another in a single, automated operation. It handles the database import, uploads copy, URL search-replace, cache flush, and any post-sync steps automatically, without any manual intervention required.
Starting a sync
- In the Altis Dashboard, go to the Sync and Export tab of the environment you want to sync into (the destination).
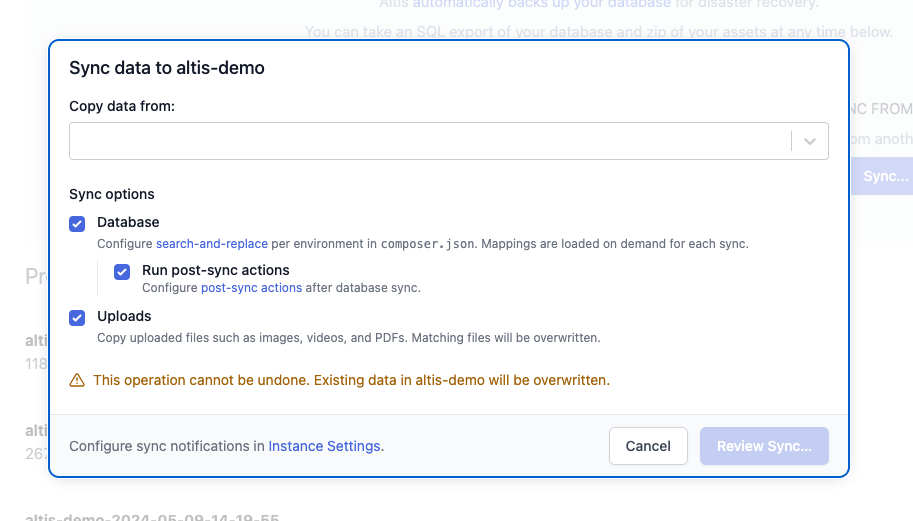
- Click Sync.
- Under Copy data from, select the source environment.
- Under Sync options, choose what to sync:
- Database. Syncs the full database. Expand Customize to specify individual tables. URL mappings are applied automatically during the sync based on your search and replace configuration.
- Run post-sync actions. Runs any post-sync actions configured for the destination environment after the database sync.
- Uploads. Copies uploaded files such as images, videos, and PDFs. Expand Restrict to subpath to limit the copy to a specific directory. Matching files will be overwritten.
- Click Review Sync and confirm to start.
Progress is shown in real time, with each step listed as it completes. If a step fails, the error is shown inline alongside the step that failed.
Sync history
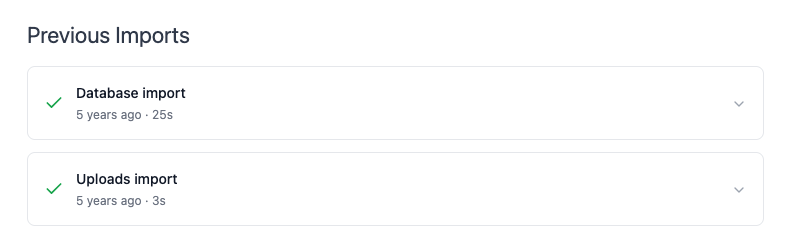
The Dashboard keeps a record of all sync operations for the environment, accessible from the Sync and Export tab. Each entry shows who initiated the sync, the source and destination environments, and the status of each step including any errors.
Export
From the Sync and Export tab you can view and download previous exports, displayed as a list, ordered by date.
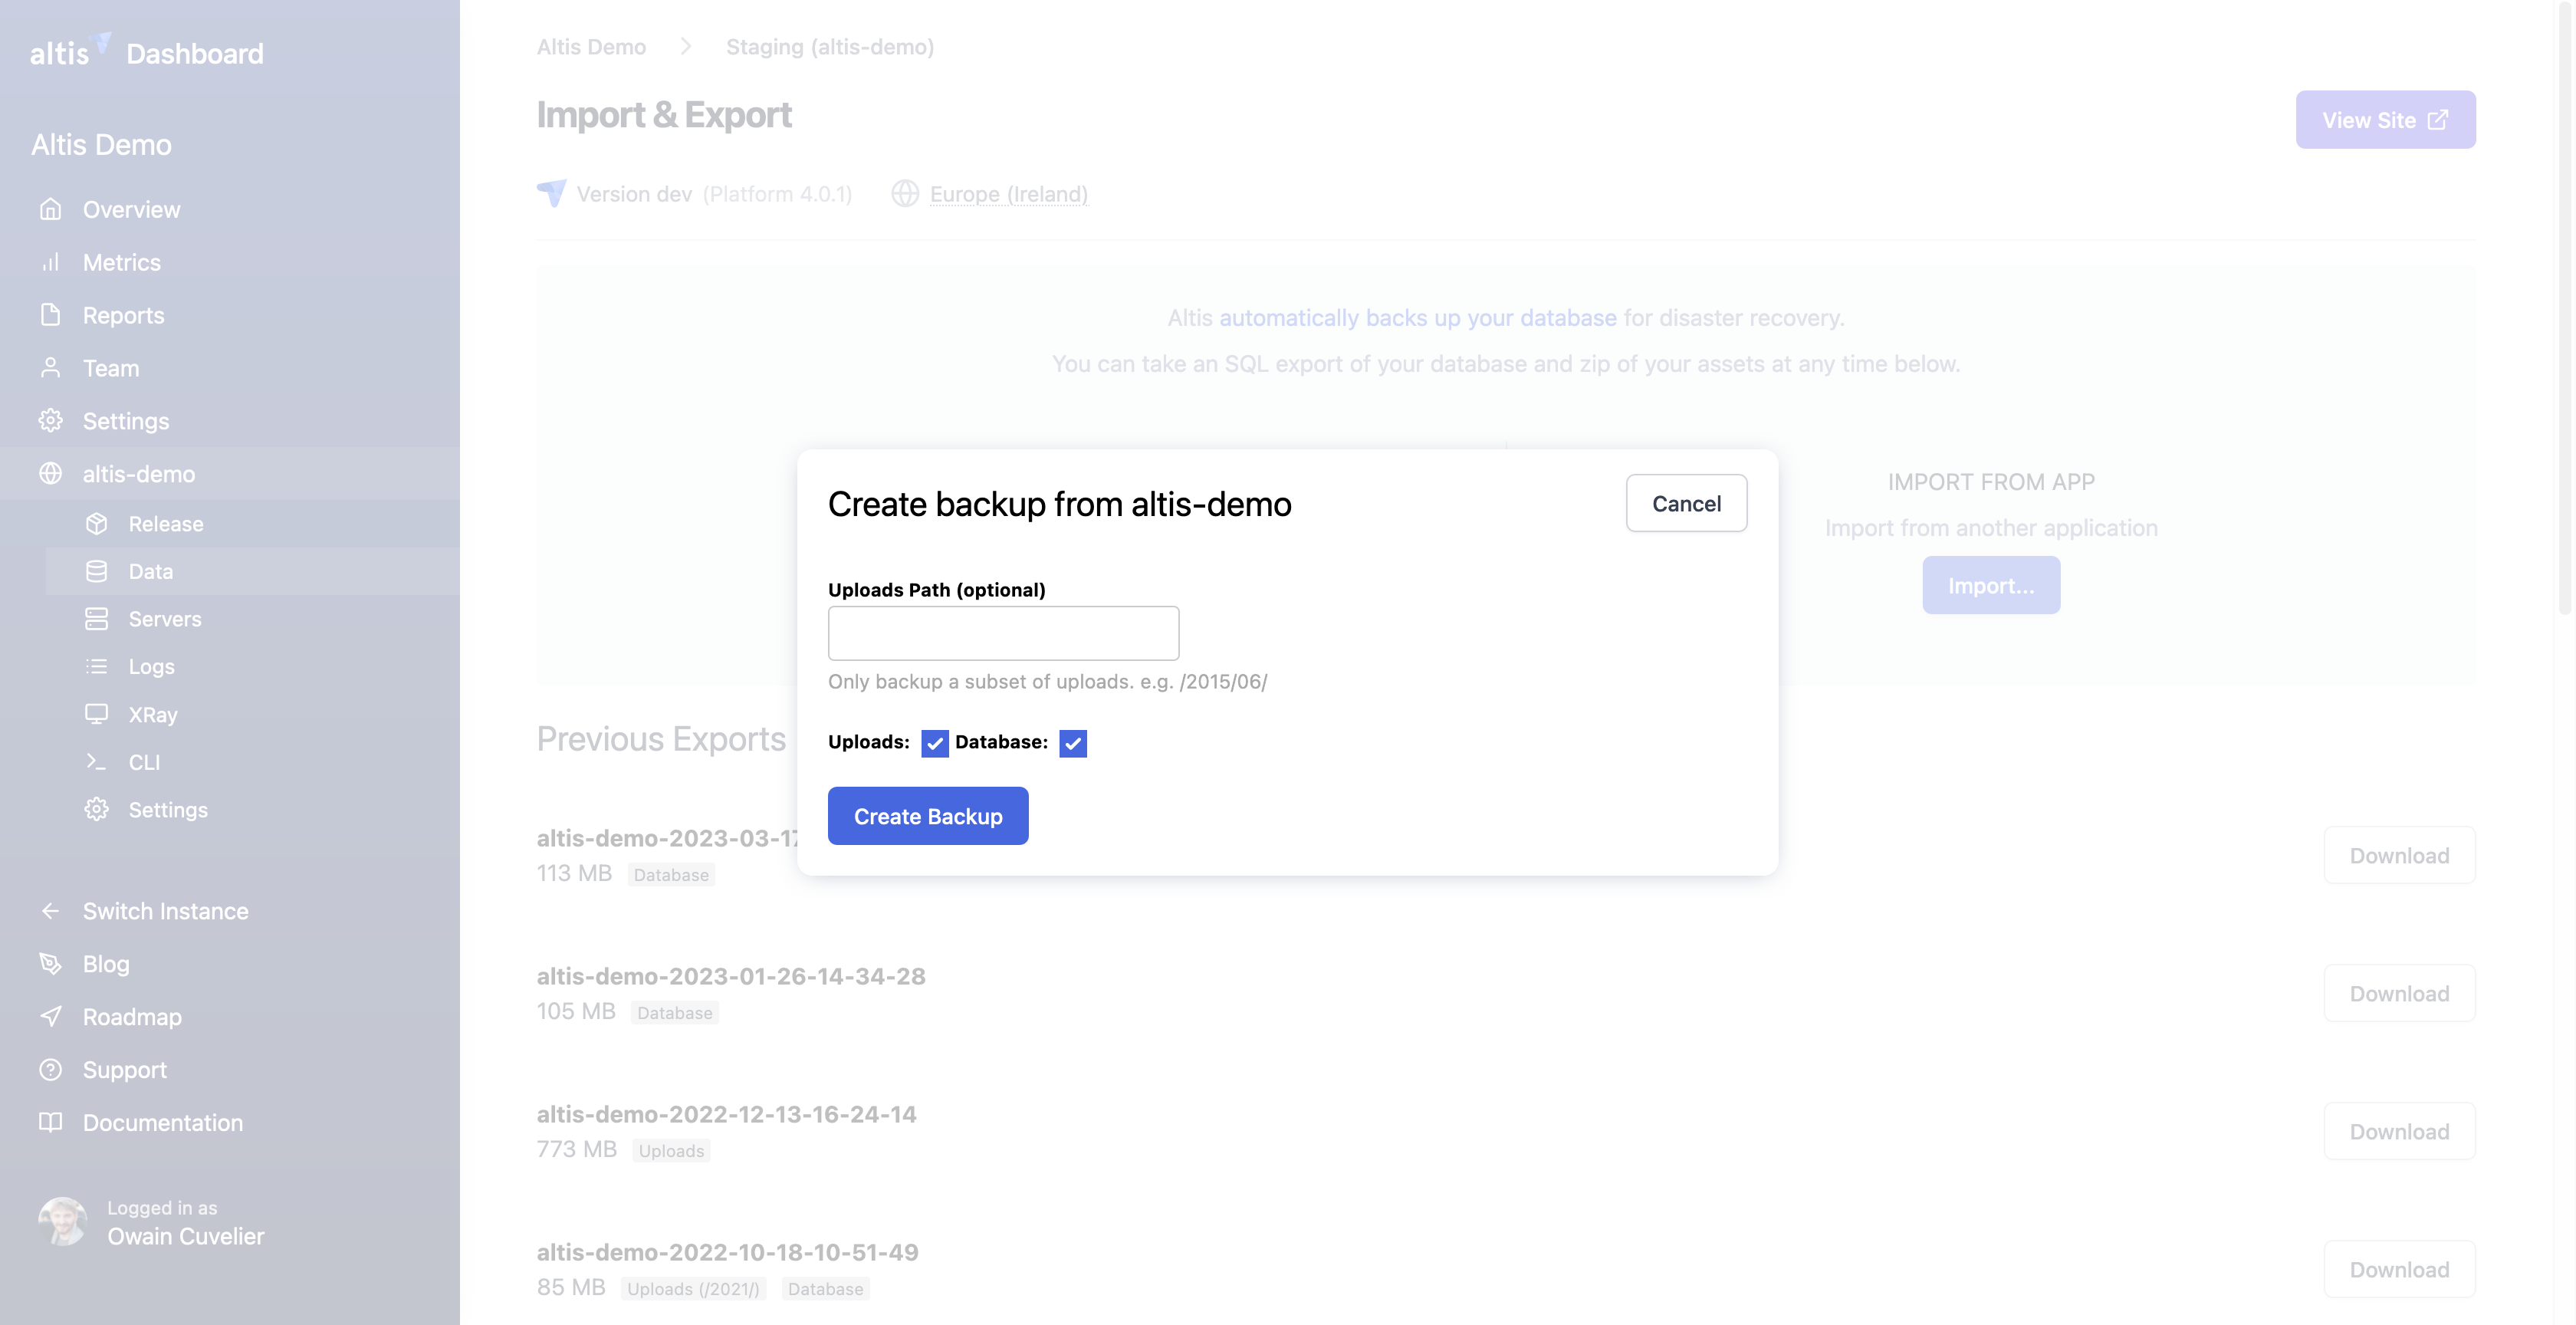
You can also create a new export of your database and/or uploads folder.
To create a new export, press the export button. This will display a new pop-up (as shown below) in which you can choose to export the uploads and/or the database. If you choose to create an export of the Uploads, you'll be able to optionally specify a path. This is useful if you only want to export the uploads in a specific directory.
Note: These features are designed with the idea that 'code moves up, content moves down'. We do not recommend you migrate
content from non-production environments to production environments. Content should typically flow
from production -> staging -> development -> test, etc.